I got in my Citroen ZX typed the code into the immobiliser keypad, cranked and cranked, but no start. Panicked slightly, at this point it was 18.30 and I was 60 miles from home. Gave it another go and voila fired up with the most almighty plume of blue smoke. The car then drove flawlessly at 70 mph all the way home.
Next day I came to drive it and this time it just wouldn’t start. Due to my flawless drive home only a day earlier, I knew it wasn’t injector issues. If it was, the failure would have left me down on power and dropping clouds of black diesel smoke. Due to running fine once started, it can’t be the last two reasons for not starting listed below:
- The glow plugs are not being powered – (won’t start, runs fine once going.)
- The stop solenoid is not lifting. (won’t start, runs fine once going.)
- Air in the fuel (might start and cut out or idle/run erratically)
- Low compression, ring or valve wear. (driveability and fuel consumption both suffer if you do get it started)
Don’t worry, their is no lift pump to fail, fuel is brought to the high pressure pump via the hand primer found on top of the engine mount on cam belt side, the only failure is for it to allow air into the sytem.
First things first, these engines will very rarely start from cold without red hot glow plugs – cranking simply does not generate enough in cylinder temperature. They are really easy to check, all you need is:
- 5 minutes
- An 8mm spanner / socket
- A multimeter
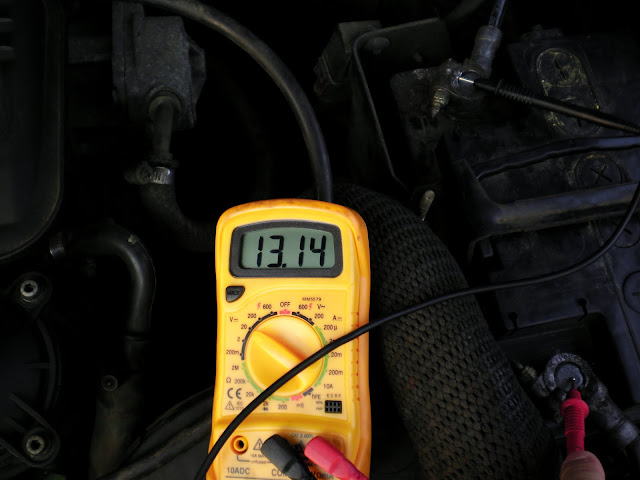
1) Check you have a decent battery. I set my multimeter up to read in the 20v range and dropped my meter probes onto the battery terminal. Expect to see well in excess of 12volts for a healthy battery. With the engine off mine reads 13.14v.
2) Now you need to measure the resistance to ground for each plug. To get an accurate reading I suggest removing the power supply screwed to the top of each plug. Look closely in the image below, I have removed the power from the left most glow plug.
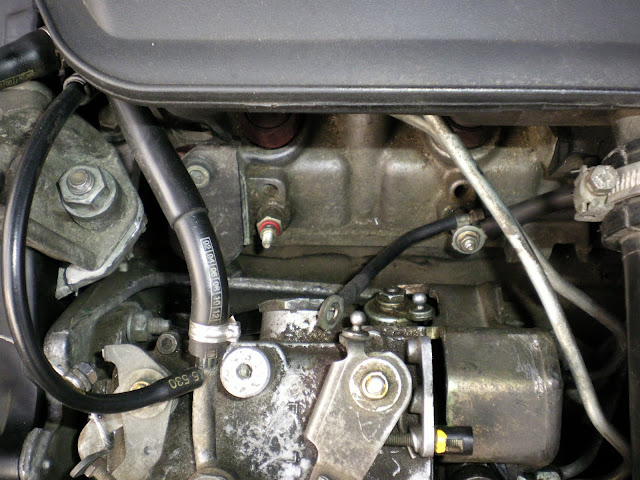
3) Set your multimeter up to read low resistance, I set mine up for 200 ohm or less. Now connect the meter’s ground lead to a suitable ground, negative battery terminal is fine. The positive should go on the top where the power rail plugs, expect a resistance of less than 1 ohm. My number 1 glow plug measured a corrected 0.7 ohm. The correction is -0.1 ohm as this is the resistance measured when I touch the two probes together. If the glow plug has failed it will read open circuit, giving the resistance of thin air (very very high!!)
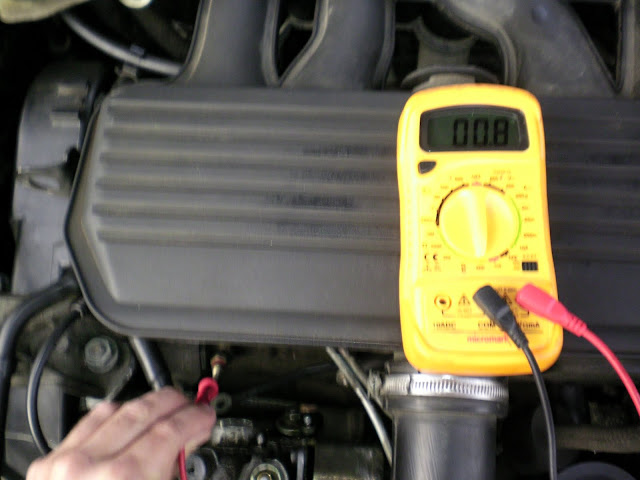
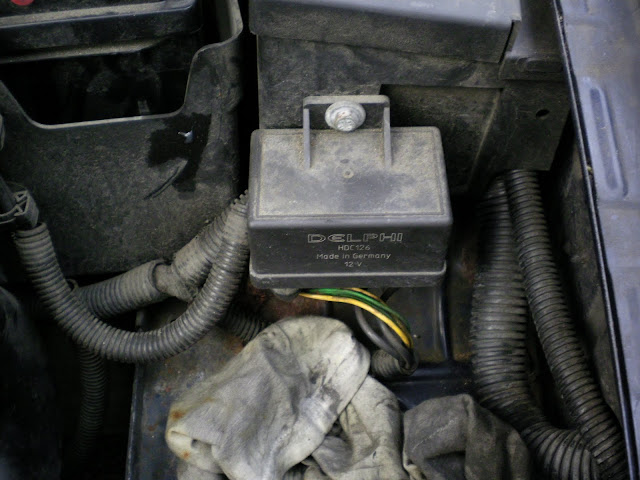
4) Assuming all plugs are in good shape, you MUST check that they are being powered when you turn on the ignition. Do not skip this step because it is most likely that a sudden no start condition is caused by a bad earth or failed relay box, pictured below.
5) So if I think back to school a couple of formulas can be used to theorise what voltage should be read from the power rail feeding all 4 glow plugs. Assume all plugs measure a corrected 0.7 ohms.

~ Rtot =1/( (1/0.7) x 4)
~Rtot = 0.175 ohms
We can meaure the voltage across one plug, this is essentially acting as a potential divider :
– Vin is the supply voltage acting across the whole circuit, this is battery voltage = 13.14volts in this instance.
– Rtotal is the equivalent of Rtop = 0.175 ohms.
– Rbottom is the resistance measured earlier across one of our glow plugs. Now we want to measure Vout across that glow plug.

Vout = (0.7 / 0.175 + 0.7) x 13.14
Vout = 10.51 volts
Furthermore we can apply kirchoffs 2nd law: “The sum of the emfs in any closed loop is equivalent to the sum of the potential drops in that loop.”
Applied below, where x = potential drop.
13.14 – x = 4x
13.14 = 5x
x = 2.63
one potential drop is observed at 13.14 -2.63 = 10.51 volts.
In actual fact I measured a mere 9.43 volts across my glow plug when I turned on the igniton on during glow plug warming period:
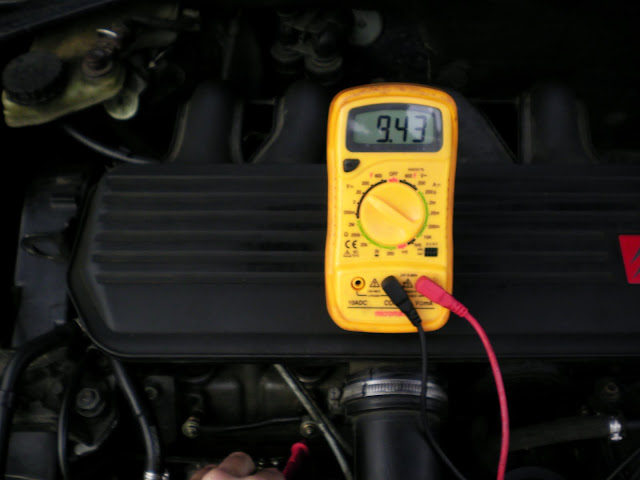
The crucial step, power up the plugs and measure voltage on the power rail
So how much heat are these babies pumping out when they get switched on?
V = IR
I = 9.43 / 0.7
I = 13.5A per plug, giving a power of P = IV, P = 127 Watts.
Anyway I seem to have digressed. Assuming you have power going to your rail and after approx 20 secs you see the voltage across a charged glow plug drop back to ground listen to the relay box as it clicks back. If something is amiss, try bashing the relay box or simply unplug, clean up the contacts and plug back in.
If you absolutely must get home, I recommend spraying 1-2 seconds worth of easy start parrafin or perhaps even try some WD-40 into the intake! This has a low flash point and will combust from cold without glow plugs, allowing diesel combustion to initiate. Beware combustion occurs rather uncontrolled, it causes nasty knocking- potentially damaging big end bearings. It can also cause the engine to over rev as it burns uncontrollably, that being said, use sparingly better too little than too much.
If those checks confirm glow plugs to be working, it is likely that the failure to start is caused by the stop solenoid. On my car it is used in conjunction with the immobiliser. When the immobiliser is satisfied you have typed the correct code it sends a message to a unit hidden behind a tamper shield. This unit, upon receiving the message, drops 12volts across the solenoid and lifts a plunger up. This plunger is designed to stop fuel from being drawn from the fuel filter into the pump when down. Check out the suction cup on the bottom, the action of the pump drawing fuel in, actually pulls the plunger on tighter, when in the ‘off’ position. Here’s what it looks like when removed:

The offending article
So with this stopping fuel flow, my engine was not ever gonna start! To get to it is not elementary. The stop solenoid is hidden under a hardened steel shroud. There are 3 sheer bolts plus a nut and bolt at the bottom stopping any ‘would be’ thief from doing exactly what I needed to do – remove the plunger and therefore allow the engine to start.
I borrowed the services of a local handyman for the afternoon. He got the shroud off in a couple of hours using a hammer chisel and centre punch to turn the sheer bolts. And here it is off…
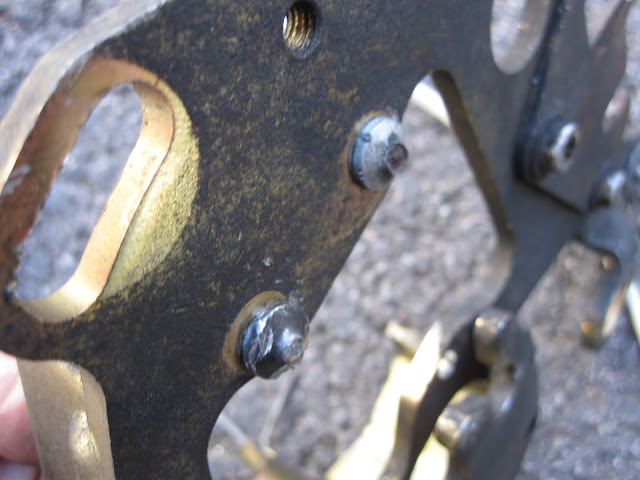
You can make out where the chisel went in to those bloody awkward bolts. Don’t be afraid to disconnect the high pressure fuel lines and intake manifold to improve access for that chisel to work the bolts round ‘slowly but surely’. I am told the most awkard of the three is the one at the bottom (blurred in this image, directly below the other two). He used a mirror to get a visual on the bolt and hit it round with a centre punch.
With the tamper shield off, we pulled the stop solenoid out and watched to see if it popped in and out with the ignition and code. It did but I reckon that was due to all the disturbance it had had. I insisted we reassemble the pump with the plunger completely removed from the solenoid to see if the old girl would run.
We had to bleed the high pressure fuel lines as they had been taken out to improve access. This was achieved, by loosening one at a time, the unions into the injector body and cranking the engine until fuel started coming out at the injector, repeat for all four. Now I cranked for a further 3 – 4 secs whilst my assistant held the throttle open. It fired and ran for the first time in a week! I quickly removed the key from the ignition and of course it kept going. Beware of doing this, I believe you remove the battery circuit from the alternator whilst it is still generating current, this is not advised and can damage stuff!
I cannot switch the car off any more with the key, I need to pull on the fuel cut off under the bonnet or simply stall the engine in gear. I could wire a new solenoid to operate off ignition feed but where’s the fun in that? Instead I simply tug on this rip cord when I’m finished with the car. (see pictures)

Manual engine shut off
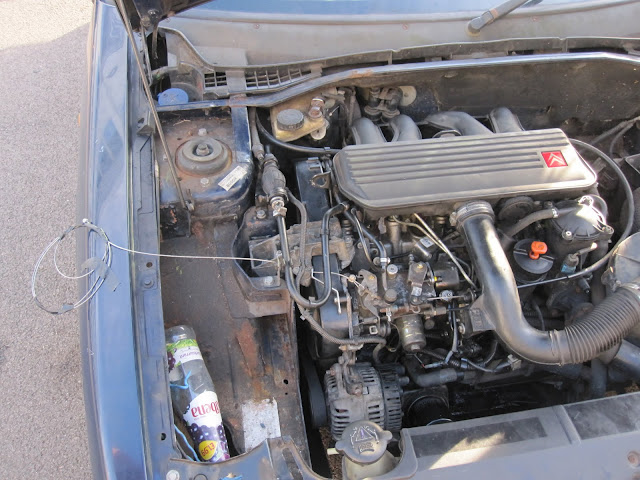
FIXED!

